C/C++ project setup in Eclipse
by rgrunber
A lot of developers probably use the Eclipse IDE for Java development, but fewer use the CDT for C/C++ applications. The purpose of this quick demo is to show that the CDT along with some other well-known plugins are perfectly capable of handling more than just your standard “Hello World” program.
For this we’ll need to have the CDT, Autotools, and EGit installed on top of the standard Eclipse platform. If you’re running Fedora, then you can do this simply with :
$ yum install eclipse-cdt eclipse-egit
Otherwise, you’ll either need to see if your Linux distribution packages those tools, or you can just install them through their update sites. In fact, the Autotools plugin has been contributed to the CDT so future releases will likely come with it as an option.
For this demonstration, I’ll be using GIMP. The project has a git repository. So we’ll start off by importing the project from git (File -> Import).
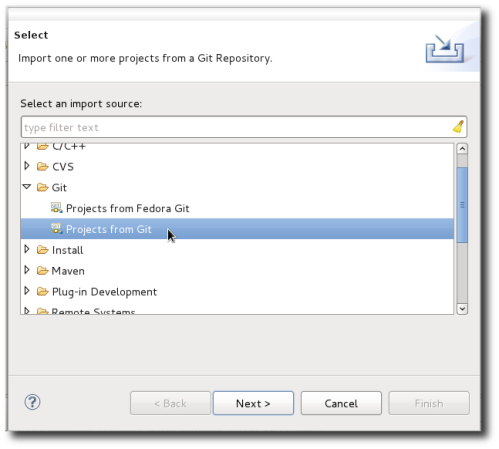
I actually copied the repository URI beforehand and it has been completed into the required fields. Pretty convenient.
Once the repo has been queried we should get to select a list of branches we’d like to clone. In this case, let’s have all of them.
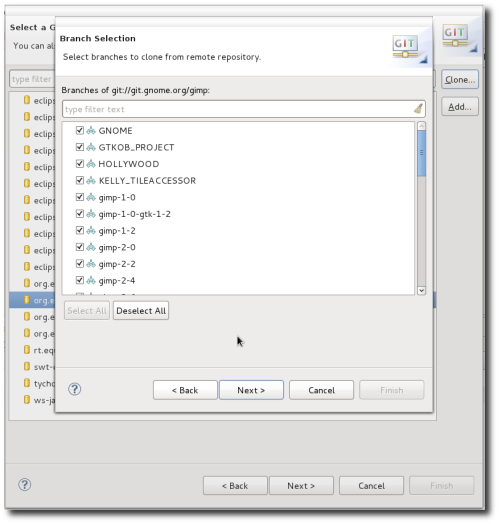
The default directory ($HOME/git), branch and remote name will be fine. For those wondering why EGit clones the project outside of the workspace by default, this is because of some repository considerations that need to be taken into account.
Basically, EGit may attempt to scan your workspace’s .metadata folder if your repository is in the workspace. In addition Eclipse may scan your .git folder, which would also be a bit of a performance hit, and ultimately unnecessary.
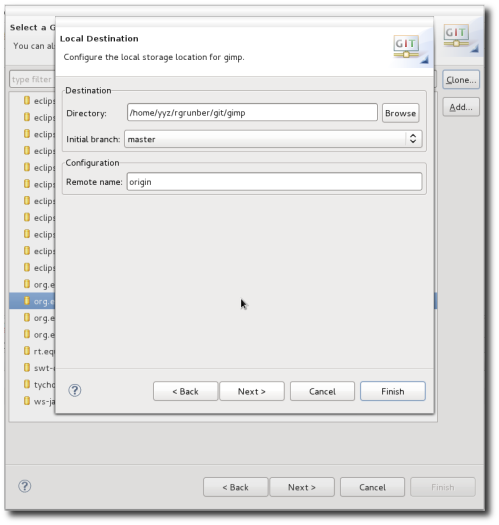
There are additional steps to configure Gerrit but we won’t be using this, so we can click on Finish.
Now we’ll import the repository.
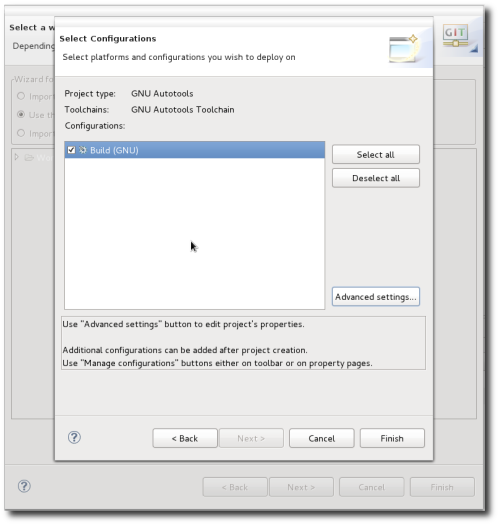
We’ll use the New Project wizard to configure this as an Autotools Project.
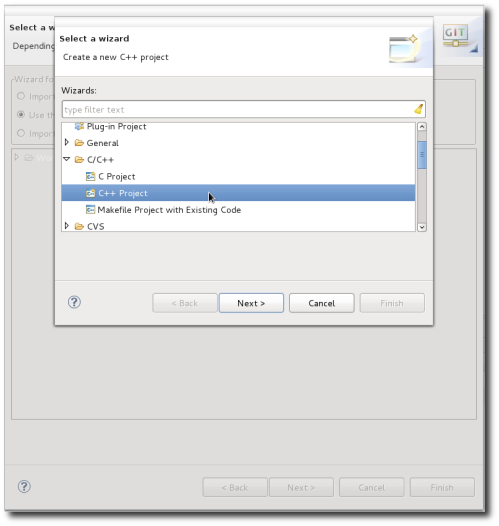
We’ll select C++ Project, and the GNU Autotools Empty Project. Our project won’t actually be empty, because we’re going to give it the path to the git repository we just cloned.
We’ll settle for the defaults here, and click on Finish.
I switched to the GIMP_2_7_5 tag by right clicking on the project then going to Team -> Switch -> Other, and selecting it from the list of tags.
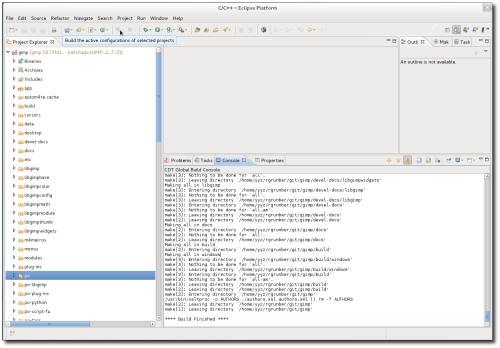
From here, we can build the project. This might take some time but we can monitor progress (or errors) from the build console.
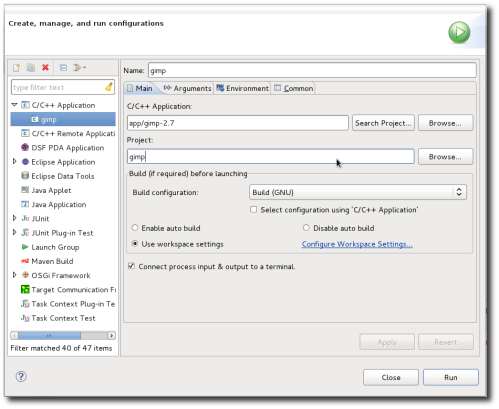
Once the project is built, we should see the relevant binaries created under the project folder. Now we can right click on the project, and go to Run As -> Run Configurations. The actual gimp binary is called by a shell script that sets up the necessary configuration files needed so we’ll list the path to that script relative to the project root.
We now run this configuration.
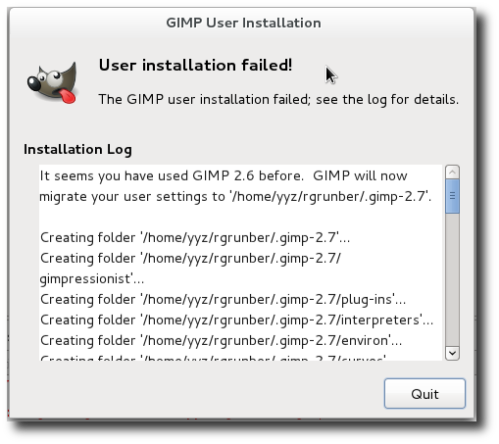
… and it fails. Well, not really.
It seems the first launch needed to create some files/folders for various settings. If we close this, and run it again :
So to recap, we imported a git project, configured it as an Autotools project, built it, and ran it. All of this without needing to leave the comfort of Eclipse.
In the next segment, I’ll probably cover the use of some profiling tools that integrate with Eclipse.




Very cool!
Reblogged this on jerboaa's Blog and commented:
A collegue of mine has posted a tutorial as to how to build and develop Gimp using Eclipse CDT. Very cool, check it out!
[…] colleague of mine has posted a tutorial as to how to build and develop Gimp using Eclipse CDT. Very cool, check it out! Share this:TwitterFacebookLike this:LikeBe the first to […]
[…] at my previous post, you may have probably noticed an error marker on the gimp project itself, along with some […]